Resistance band exercises offer seniors a joint-friendly way to maintain muscle mass and improve balance. Try these effective movements: seated rows for upper back strength, band pull-aparts for posture, seated leg presses for lower body power, clamshells for hip stability, chest presses for upper body, bicep curls for arm strength, and standing side leg raises for balance. These exercises engage multiple muscle groups simultaneously while reducing fall risk. The following guide explores proper techniques and safety considerations for maximum benefit.
The Benefits of Resistance Band Training for Older Adults

While aging naturally leads to muscle loss and decreased flexibility, resistance band training offers a powerful solution for seniors looking to maintain their physical health.
Most adults lose 30-50% of their muscle mass between ages 30-80, but resistance exercises can counteract this decline.
Age-related muscle loss is inevitable, but regular resistance training provides a powerful antidote to this natural decline.
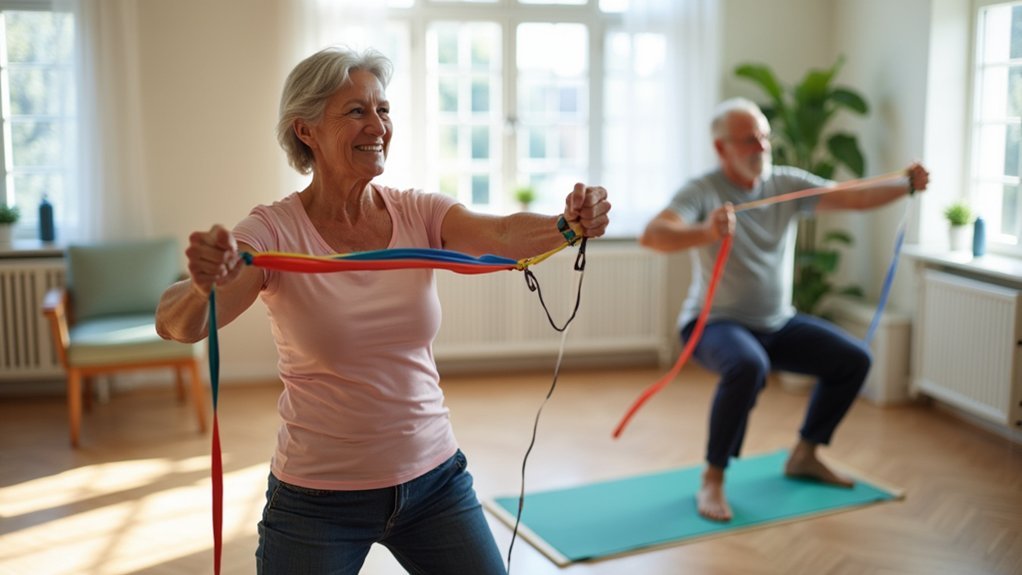
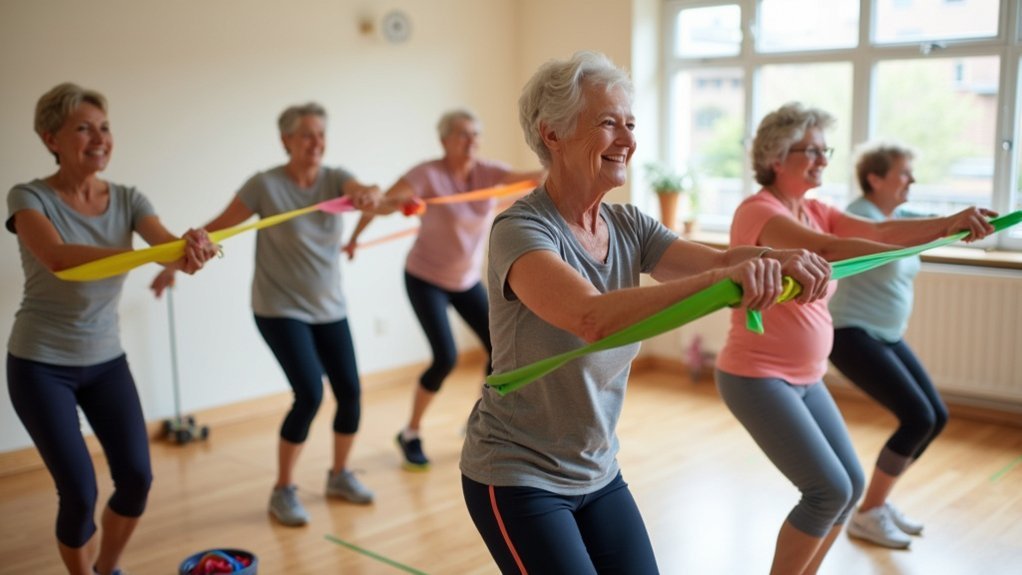
You’ll find these colorful elastic bands particularly beneficial because they’re joint-friendly, providing variable resistance that won’t strain your body like traditional weights.
They improve your functional fitness by mimicking daily movements like reaching and lifting, making everyday tasks easier.
The low-impact nature makes bands ideal if you have arthritis or joint concerns.
Plus, they strengthen core and stabilizing muscles, improving your balance and reducing fall risk—a vital benefit as stability naturally decreases with age. Simple seated resistance exercises can be modified for those with limited mobility while still effectively targeting major muscle groups.
Seated Row: Strengthen Your Upper Body and Core
The seated row strengthens your entire upper back while engaging your core for improved posture and stability.
You’ll feel multiple muscle groups working simultaneously, including your lats, rhomboids, and biceps, creating a thorough upper body workout.
When performing this exercise, remember to squeeze shoulder blades together to maximize back muscle activation and enhance the effectiveness of the movement.
Start with proper positioning and lighter resistance bands before increasing tension, ensuring you maintain a straight back and controlled movements throughout the exercise.
Proper Positioning Techniques
Mastering proper positioning during seated row exercises can transform your resistance band workouts from merely adequate to highly effective. Sit in a sturdy chair with your feet firmly planted on the ground for stability. Keep your back straight and neutral—avoid hunching forward or arching excessively. This exercise provides controlled strength building without placing excessive pressure on your joints.
| Position Element | Correct Technique | Common Error | Correction |
|---|---|---|---|
| Back Alignment | Straight, neutral spine | Hunching forward | Engage core, pull shoulders back |
| Foot Placement | Flat on floor, hip-width apart | Feet too close or raised | Plant feet firmly, shoulder-width |
| Hand Position | Grips even, palms facing in | Uneven grip height | Adjust band to equal length |
| Elbow Movement | Close to body during pull | Flaring outward | Keep elbows tucked near ribs |
Remember to breathe steadily and engage your shoulder blades by squeezing them together during the pulling motion.
Multi-Muscle Engagement Benefits
Resistance band seated rows offer exceptional value for seniors by simultaneously engaging multiple muscle groups in a single, efficient movement. By working your back, shoulders, and core muscles together, you’ll build functional strength that translates to improved posture and reduced back pain.
Unlike isolated exercises, seated rows help you develop better coordination and balance—crucial skills for preventing falls. You’ll also save valuable workout time while achieving more thorough results.
The beauty of this exercise lies in its adaptability; you can easily adjust resistance levels to match your abilities. For maximum safety and effectiveness, remember to perform a gentle warmup beforehand to prepare your muscles for exercise.
When combined with other multi-muscle exercises like leg presses and bicep curls, you’ll create a well-rounded routine that counteracts age-related muscle loss and enhances your ability to perform daily activities independently.
Form Before Resistance
When approaching seated row exercises, prioritizing proper form over heavy resistance will maximize your benefits while minimizing injury risk. Maintain a straight back with chest up, wrapping the band around your feet while using a neutral grip. Remember to engage your core throughout the movement.
Start by squeezing your shoulder blades together as you pull the band toward your chest, keeping elbows close to your body. Return to starting position with controlled movement. For seniors, double looping bands provides an effective way to adjust resistance without compromising form.
| Technique Element | Correct Form | Common Mistake |
|---|---|---|
| Back Position | Straight, chest up | Rounded, slouched |
| Elbow Movement | Close to body | Flared outward |
| Movement Speed | Slow, controlled | Jerky, rushed |
For best results, begin with lighter resistance and focus on mastering proper technique before progressing to stronger bands.
Band Pull Apart: Improve Your Posture and Shoulder Health
Position your resistance band at shoulder height with your arms extended, ensuring the band is taut but not overstretched.
As you pull the band apart, focus on squeezing your shoulder blades together to fully engage the upper back muscles essential for good posture. This exercise actively targets your rhomboids and traps, which are critical muscles for maintaining shoulder stability as you age.
Choose a band with appropriate resistance—lighter bands work well for beginners while stronger bands provide progressive challenges as your strength improves.
Proper Band Positioning
Mastery of proper positioning forms the foundation of effective band pull-aparts for seniors.
Hold the resistance band with your arms extended in front at chest height, using a palm-down grip to maximize shoulder muscle engagement. Keep your spine straight and avoid raising your shoulders toward your ears.
Adjust the band’s tension according to your comfort and strength level—you’ll want enough resistance to feel the exercise working but not so much that your form suffers. If you’re just beginning, try pulling the band apart to a 45-degree angle rather than fully horizontal.
For seniors specifically, focus on slow, controlled movements to prevent injury.
The band pull-apart exercise is especially effective at preventing rounded shoulders while strengthening your upper back muscles.
This proper positioning will help target your rear deltoids, trapezius, and rhomboids effectively while improving posture and shoulder stability.
Upper Back Engagement
Properly engaging your upper back during band pull-aparts delivers powerful benefits beyond mere exercise.
These movements specifically target your deltoids, rhomboids, trapezius, and rotator cuff muscles—all essential for maintaining shoulder stability and good posture.
As you pull the band apart horizontally, you’ll counteract the forward shoulder posture that develops from hours of sitting.
This is especially valuable if you’re dealing with upper back pain or stiffness from a sedentary lifestyle.
The controlled motion strengthens the muscles that support proper spinal alignment while improving shoulder mobility. Stand tall with your arms extended and maintain proper arm height throughout the exercise to maximize effectiveness.
For seniors, this low-impact exercise enhances balance, reduces fall risk, and supports everyday movements like reaching for items on high shelves.
You’ll find daily activities become easier as your functional fitness improves.
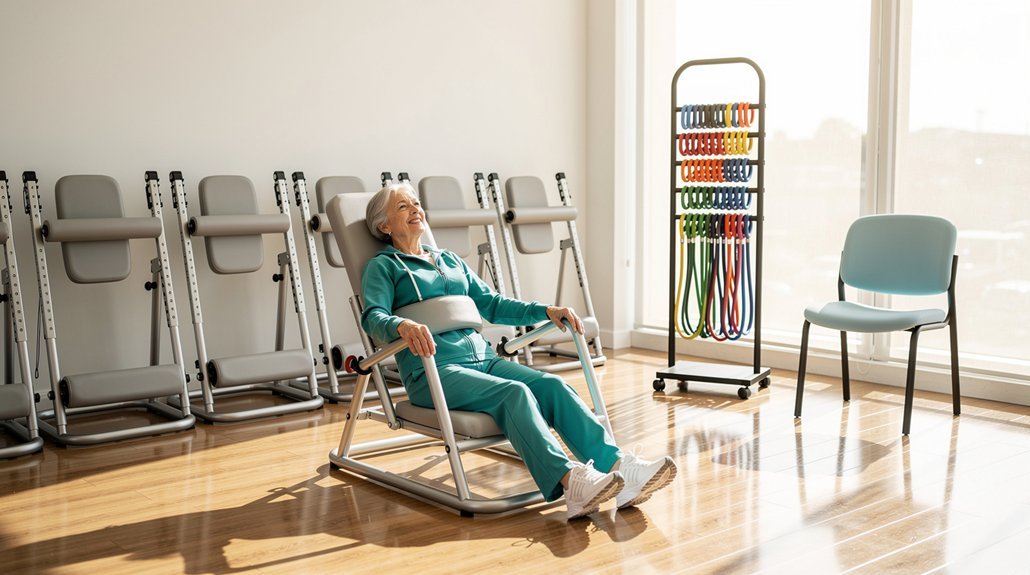
Resistance Level Selection
Selecting the right resistance band for pull-aparts can dramatically affect both your exercise experience and results. For seniors, it’s wise to start with lighter resistance bands (typically yellow) before progressing to medium (green) or heavy (red) options.
When choosing your band, you should be able to complete 10-15 repetitions with proper form while feeling a moderate challenge. If you’re straining or can’t maintain good posture, the resistance is too high. Conversely, if you don’t feel any tension, select a stronger band.
Remember to consult your healthcare provider before beginning any exercise program. As your strength improves, gradually increase the resistance level to continue building muscle.
The ideal band will provide enough resistance to work your muscles without causing discomfort or compromising your technique. The band pull apart exercise is particularly effective as it helps pinch shoulder blades together at the top of the movement, improving upper back strength.
Leg Press: Build Lower Body Strength While Seated
Strengthen your lower body while taking the pressure off your joints with seated leg presses. This accessible exercise targets your quadriceps, hamstrings, glutes, and calves while mimicking movements essential for daily activities like standing and climbing stairs.
Simply sit with good posture, wrap the resistance band around your foot, and press forward with controlled movements.
- Aim for 10-15 repetitions per leg, up to three sets
- Keep your back straight and shoulders relaxed throughout the exercise
- Stop immediately if you experience joint or muscle pain
- Gradually increase resistance as your strength improves
You can follow a repetition pattern of twelve, eight, and four presses with increasing speed as you progress through each set.
For best results, incorporate leg presses into your routine three times weekly, alongside complementary exercises like bicep curls and seated rows for an all-encompassing workout plan.
Clamshell Exercise: Target Hip Stability and Balance

Hip stability forms the foundation of balance and mobility in older adults, making the clamshell exercise an invaluable addition to any senior’s fitness routine. This low-impact movement specifically targets your gluteus medius, which plays an essential role in preventing falls and maintaining proper gait.
The cornerstone of senior wellness lies in hip strength, with clamshell exercises offering a gentle yet powerful way to maintain independence and prevent falls.
To perform clamshells, lie on your side with knees bent at 45 degrees, keeping your hips and shoulders aligned. Place a resistance band just above your knees for added challenge. While keeping your feet together, lift your top knee without rotating your hips, then slowly lower it back down. The clamshell is particularly beneficial for teaching core control by isolating leg movement from the rest of the body.
You’ll appreciate that clamshells can be modified to suit your fitness level. As you progress, try different band resistances or positions.
This exercise not only strengthens hips but also reduces knee and back pain risks.
Chest Press: Maintain Upper Body Strength Safely
The chest press stands out as a cornerstone exercise for seniors looking to maintain functional upper body strength without risking injury. This low-impact movement strengthens your pectoral muscles while improving posture and enhancing your ability to perform everyday pushing motions.
To perform correctly, place the resistance band behind your shoulders, hold both ends firmly, and extend your arms forward. Remember to exhale during extension and inhale when returning to the starting position. You can do this exercise either seated or standing.
- Start with 10-15 repetitions, increasing resistance gradually as you get stronger
- Always warm up before beginning and maintain proper alignment throughout
- Consider alternating arms for more targeted strengthening
- Aim to incorporate chest presses at least twice weekly in your strength routine
This exercise is particularly valuable for those over 65 who need to engage in resistance training to combat age-related muscle loss.
How to Choose the Right Resistance Band for Your Fitness Level
Now that you understand the benefits of chest presses, selecting appropriate resistance bands becomes your next important step.
As a senior, you’ll want to prioritize safety and effectiveness in your selection.
If you’re a beginner or recovering from an injury, start with light resistance bands (7-12lb) that allow full range of motion without strain.
For those who are more active and seeking to build strength, medium resistance bands (18lb) provide an excellent balance.
Remember that resistance bands are versatile tools suitable for all fitness levels, enabling customized workouts that align with your personal goals.
Check the material integrity before each use, looking for tears or damage that could compromise safety.
Your resistance level should match your fitness goals—whether that’s rehabilitation, improved mobility, or increased muscle tone.
Frequently Asked Questions
Can Resistance Bands Replace Weight Training Completely for Seniors?
Resistance bands can effectively replace weights for most seniors, offering similar strength gains with less joint stress. They’re ideal for maintaining muscle, though combining with other exercises creates the most well-rounded fitness program.
How Often Should Seniors Do Resistance Band Exercises Weekly?
You should do resistance band exercises at least twice a week on non-consecutive days to allow muscle recovery. Aim for 2-3 sets of 6-12 repetitions per exercise, targeting all major muscle groups each session.
Can Resistance Bands Help With Arthritis Pain?
Yes, resistance bands can help with your arthritis pain. They provide low-impact strength training that builds supportive muscles around joints, improves flexibility, and reduces inflammation while minimizing stress on your affected joints.
Are Resistance Bands Safe After Joint Replacement Surgery?
Yes, you’ll find resistance bands are generally safe after joint replacement surgery. They provide low-impact strengthening that’s beneficial for recovery, but you should always get your doctor’s approval before starting any exercise program.
How Long Should a Resistance Band Workout Session Last?
Your resistance band workout should last 20-30 minutes. Keep sessions short enough to maintain engagement but long enough to be effective. You’ll need 2-3 sessions weekly with adequate recovery time between workouts.
In Summary
You’ve got a powerful toolkit for strength training that’s gentle on your joints! By incorporating these seven resistance band exercises into your routine, you’ll improve balance, strength, and mobility without the risks of heavier weights. Start with lighter resistance and progress as you feel comfortable. Remember, consistency is key—even 10-15 minutes a few times weekly will help you maintain independence and enjoy your daily activities with confidence.


Leave a Reply