You’ll maintain strength and independence through ten essential daily exercises: squats for lower body power and fall prevention, seated rows to combat forward shoulder collapse, bicep curls for arm strength, calf raises for mobility, modified planks for core stability, leg presses for enhanced control, band pulls for posture correction, wall push-ups for upper body development, standing hip abductions for pelvic stability, and tricep extensions for joint mobility. These targeted movements counter sarcopenia, improve bone density, and preserve functional strength for daily activities like climbing stairs and carrying groceries, while the complete guide below reveals proper form and progression techniques.
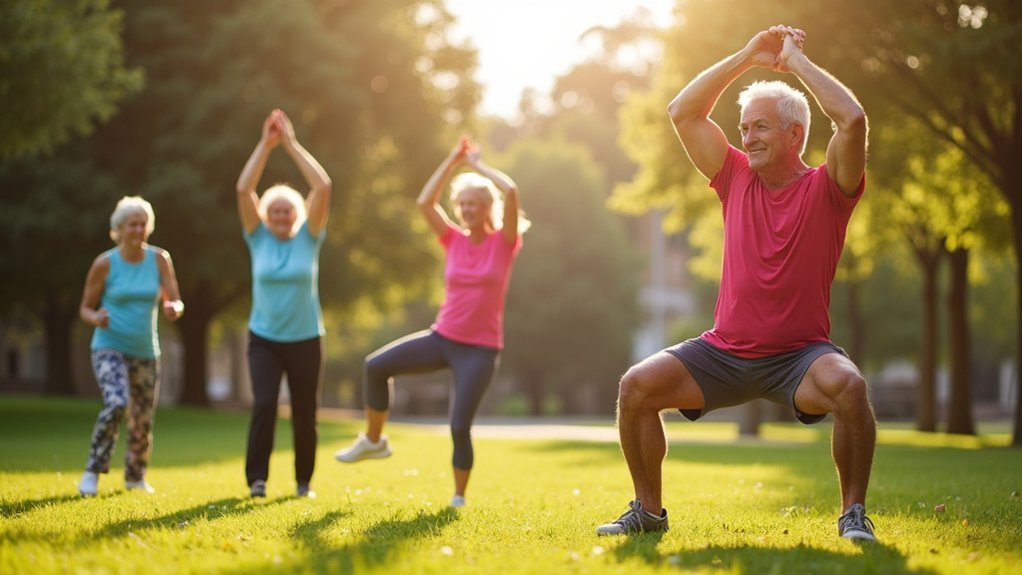
Squats for Lower Body Power and Balance

As you age, maintaining lower body strength becomes vital for preserving your independence and quality of life.
Squats strengthen all muscle groups in your legs—calves, quadriceps, and hamstrings—while combating sarcopenia, the natural loss of muscle mass. They’re fundamental for everyday activities like walking, climbing stairs, and standing from seated positions.
Regular squatting considerably improves your balance and stability, reducing fall risk through stronger legs and better coordination. This exercise maintains functional leg strength while preserving mobility and independence.
Squats also improve bone density, further protecting you from fractures. Research shows that seniors with stronger quadriceps are linked to lower mortality rates, highlighting the life-extending benefits of this fundamental exercise.
Beyond physical benefits, squats enhance mental resilience and support healthy posture.
Whether you choose chair squats, bodyweight variations, or assisted squats, adjusting depth accommodates your fitness level while delivering these vital benefits for active aging.
Seated Rows for Back and Shoulder Stability
While squats build your lower body foundation, seated rows target the often-neglected upper back muscles that keep you upright and stable throughout daily life. These exercises counteract forward shoulder collapse from sitting and device use, strengthening muscles that improve posture and reduce slouching.
| Setup Element | Proper Technique |
|---|---|
| Seat Height | Position hips slightly above knees |
| Chest Pad | Place on mid-chest with arms fully extended |
| Weight Selection | Start light to master form first |
| Spine Position | Maintain neutral alignment throughout |
You’ll enhance shoulder joint stability while supporting core engagement through trunk stabilization. Pull handles toward your torso, squeezing shoulder blades together to activate back muscles effectively. This movement improves circulation, opens your chest, and builds functional strength for daily activities like carrying groceries. The pulling elbows back motion while squeezing shoulder blades is essential for maximizing the effectiveness of each repetition.
Bicep Curls to Maintain Arm Strength
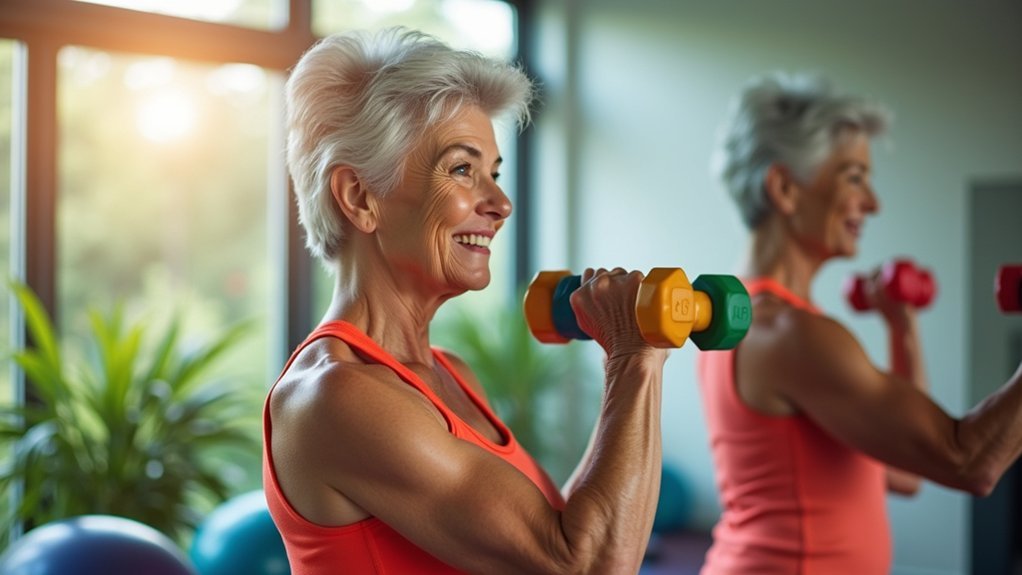
You’ll want to master proper bicep curl form before increasing weight, keeping your elbows stable at your sides while controlling both the lifting and lowering phases.
Whether you’re using dumbbells, resistance bands, or household items like water bottles, you’ve got plenty of equipment options that’ll work effectively for this exercise.
Start with lighter resistance and gradually increase the challenge as your strength improves, ensuring you can complete 8-12 repetitions with good form before progressing to heavier weights. This progressive overload approach helps maximize muscle development while reducing injury risk as you age.
Proper Bicep Curl Form
Three fundamental elements define proper bicep curl form: positioning, movement execution, and breathing technique.
Start by standing with feet hip-width apart, knees slightly bent, and hold dumbbells at your sides with palms facing forward. Keep your shoulders back, abs engaged, and elbows close to your body just in front of your ribcage. Hinge at the hips to lean slightly forward, which pre-stretches the biceps for added tension.
During the curl, rotate your wrists upward while flexing your elbows, focusing on controlled movement rather than speed. Squeeze your biceps at the top and hold briefly before lowering slowly. Avoid swinging or using momentum—your upper arms should remain stable throughout.
Breathe out as you curl up and inhale as you lower over three counts. Choose weights that challenge your final two reps while maintaining proper form.
Equipment Options Available
You don’t need expensive equipment to strengthen your arms effectively. Dumbbells work excellently for home workouts, and you can substitute household items like water bottles when needed.
Community programs such as SilverSneakers offer accessible classes incorporating bicep exercises.
Whether you choose commercial machines with stainless steel guide rods or simple dumbbells, consistent training maintains your arm strength for daily activities. Professional equipment features independent motion that enhances exercise variety and improves overall training effectiveness.
Progressive Resistance Training
Progressive resistance training transforms ordinary bicep curls into a powerful tool for maintaining arm strength as you age.
You’ll target your biceps brachii, brachioradialis, and brachialis muscles while gradually increasing weight or resistance over time. This approach stimulates muscle growth and creates positive neural adaptations that enhance your functional independence.
You’ll notice improved grip strength and better posture as your biceps strengthen, reducing your risk of falls and elbow injuries. Strong arms support daily activities like lifting groceries and carrying objects with less strain.
The key is consistency – regularly performing bicep curls with proper form while progressively challenging your muscles. You can use dumbbells, barbells, or resistance bands to provide varied stimuli. For optimal results, perform bicep curls using full ROM to promote muscle growth and reduce injury risk.
This systematic approach protects your joints while building the arm strength essential for active aging.
Calf Raises for Mobility and Fall Prevention
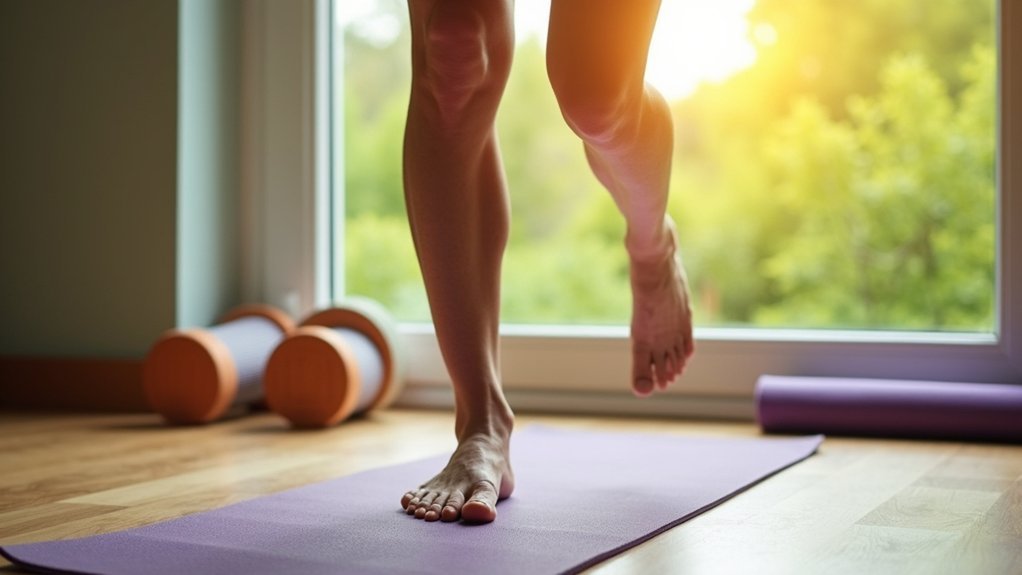
You’ll want to master proper calf raise technique to maximize the mobility and fall prevention benefits this simple exercise offers.
Stand tall with your feet hip-width apart, slowly rise onto your toes by lifting your heels, then lower back down with control.
This movement strengthens your gastrocnemius and soleus muscles while improving balance and stability that’s essential for preventing dangerous falls as you age. Calf raises help counteract age-related sarcopenia by promoting muscle hypertrophy and maintaining the lower limb strength needed for essential movements like walking and climbing stairs.
Proper Calf Raise Technique
Master the fundamentals of calf raises to build stronger lower legs and improve your stability for daily activities.
Start with proper stance—keep your posture straight and knees slightly ajar to reduce joint strain. Engage your core muscles throughout the movement to maintain stability and control.
Move slowly and deliberately, lifting onto your toes in a controlled manner. Don’t bounce at the bottom position, as this can strain your muscles. Breathe naturally without holding your breath to maintain proper oxygen flow.
If you’re concerned about balance, use a chair or pole for support. This doesn’t diminish the exercise’s effectiveness—it guarantees your safety. Rest your fingers lightly on the chair without gripping tightly, aiming for around ten repetitions to build strength effectively.
Focus on quality over quantity, performing each repetition with intention rather than rushing through the movement for peak muscle engagement.
Balance and Stability Benefits
Beyond building stronger calves, these exercises deliver powerful balance and stability benefits that directly impact your daily life.
You’ll greatly reduce your risk of falls and related injuries by strengthening the muscles that keep you upright and coordinated. As your calf muscles grow stronger, you’ll notice improved proprioception—your body’s ability to sense its position in space—which enhances overall stability.
These benefits translate into real-world improvements. You’ll perform daily activities like walking, climbing stairs, and reaching for objects with greater confidence and ease.
Your posture will improve, and you’ll maintain better balance while standing or moving. Most importantly, you’ll preserve your independence by reducing the fear of falling that often limits seniors’ activities, allowing you to stay active and engaged. Regular participation in these balance exercises also contributes to improved mental health and social interactions.
Modified Planks for Core Strengthening
While traditional planks might seem intimidating, modified versions offer an accessible pathway to building the core strength that’s essential for maintaining balance, posture, and injury prevention as you age.
Start with wall planks, where you lean against a wall at arm’s length, reducing strain while engaging your core. Progress to knee planks on the floor, which cut the difficulty in half while still strengthening your midsection.
Wall planks provide a gentle introduction to core training, allowing you to build strength progressively before advancing to floor variations.
You can add shoulder taps or plank walkups once you’ve mastered basic positions. Begin with 10-15 second holds and gradually increase duration as your endurance improves.
Focus on proper breathing throughout each hold—this enhances respiratory function while teaching breath control. These modifications make core strengthening achievable regardless of your current fitness level. Plank variations are suitable for all ability levels, ensuring everyone can find a starting point that works for their body.
Tricep Extensions for Complete Arm Function
The triceps brachii makes up two-thirds of your upper arm mass, yet it’s often overlooked in favor of bicep-focused exercises.
Tricep extensions activate all three muscle heads, strengthening your entire upper arm for improved lifting and pushing power. This exercise enhances joint mobility in your shoulders and elbows while promoting flexibility that reduces age-related stiffness.
You’ll engage your core muscles during proper execution, supporting spinal alignment and countering slouching posture. The functional benefits directly translate to daily activities like opening doors, rising from chairs, and lifting objects safely. Strong triceps provide joint stability that reduces injury risk during various upper body movements.
With minimal wrist stress and low-impact movement, tricep extensions adapt to any fitness level. You can perform overhead or lying variations at home, making this exercise accessible for maintaining independence and upper body strength as you age.
Leg Presses for Enhanced Lower Body Control
Strong legs form the foundation of independent living, and leg presses deliver extensive lower body strengthening that directly impacts your daily mobility. You’ll target your quadriceps, hamstrings, and glutes while simultaneously engaging your core for enhanced stability. This compound movement improves bone density, circulation, and joint flexibility—critical factors for preventing falls and maintaining independence.
| Muscle Group | Primary Function | Daily Activities Enhanced |
|---|---|---|
| Quadriceps | Knee extension | Climbing stairs, standing up |
| Hamstrings | Knee flexion | Walking, maintaining balance |
| Glutes | Hip stability | Lifting objects, posture support |
| Calves | Ankle control | Walking steadiness, balance |
Start with manageable weight and progress gradually. Perform leg presses 2-3 times weekly, focusing on proper form with controlled movements. Always warm up beforehand and consider professional supervision initially. The leg press exercise specifically helps stimulate bone-building cells through the resistance training mechanism, making it particularly valuable for older adults at risk of osteoporosis.
Band Pulls for Improved Posture Support
Since forward head posture and rounded shoulders plague countless adults who spend hours hunched over desks or devices, band pulls offer a targeted solution that strengthens your upper back muscles while correcting postural imbalances.
These exercises effectively activate your trapezius and rhomboid muscles, with activation levels reaching up to 73% of maximal voluntary contraction.
You’ll see significant improvements in your craniovertebral and forward shoulder angles when performing 15 repetitions for three sets consistently.
Diagonal upward movements maximize your upper and middle trapezius engagement, while adjusting hand positions allows targeted strengthening of specific muscle groups.
Band pulls enhance your shoulder stability and rotator cuff function, helping you maintain proper scapular alignment throughout daily activities while reducing headaches caused by poor posture. Regular practice also improves respiratory efficiency by allowing better lung expansion as your posture straightens.
Wall Push-Ups for Upper Body Development
You’ll master wall push-ups by positioning your arms shoulder-width apart against the wall and maintaining a straight line from head to heels throughout the movement.
As you build strength, you can increase difficulty by stepping further from the wall or adding more repetitions to challenge your muscles progressively.
This exercise specifically targets your chest, shoulders, and triceps while building the functional upper body strength you need for daily activities like pushing doors, lifting groceries, and getting up from chairs. Wall push-ups also serve as an excellent foundation for building strength before progressing to harder variations like standard floor push-ups or incline push-ups.
Proper Form Technique
Master the fundamentals of wall push-ups by positioning yourself an arm’s length from the wall with your feet hip- or shoulder-width apart for ideal stability.
Place your hands at shoulder height, slightly wider than shoulder width, with fingers pointing upward and pressing firmly against the surface.
Maintain proper alignment throughout the movement:
- Keep your body straight from head to heels while engaging your core muscles to prevent lower back sagging or hip displacement.
- Control your range of motion by lowering your chest toward the wall slowly until just shy of touching, then push back steadily without locking your elbows.
- Position your elbows at a 45-degree angle to your body rather than flaring them wide to protect your shoulder joints and maximize effectiveness.
This exercise provides low impact benefits compared to traditional pushups while still delivering effective upper body strengthening results for practitioners of all fitness levels.
Progressive Difficulty Levels
When starting your wall push-up journey, you’ll progress through three distinct levels that systematically build upper body strength and endurance.
Level 1 begins with standing close to the wall, performing 2 sets of up to 30 reps. You’ll position your feet directly under your shoulders with hands at chest height, shoulder-width apart.
Level 2 increases your distance from the wall, requiring greater upper body engagement. You’ll aim for 2 sets of 50 wall push-ups while maintaining proper hand positioning with fingers pointing up.
Level 3 advances to 3 sets of 50 repetitions. You can step further from the wall for increased resistance. Remember to rest 2-3 minutes between each set before progressing to ensure proper recovery and maintain good form.
Once you’ve mastered this level, you’re ready for specialized variations like one-leg wall push-ups or decline positions.
Upper Body Benefits
Building your wall push-up capacity through these progressive levels delivers extraordinary upper body strength gains that extend far beyond simple muscle development.
You’re simultaneously engaging multiple muscle groups in your shoulders, arms, and chest while creating protective strength around your joints to prevent injuries. This functional power translates directly into daily activities like pushing yourself up from chairs or lifting objects with confidence.
Research reveals that higher push-up capacity greatly reduces your cardiovascular disease risk, with those completing over 40 push-ups showing dramatically lower incident rates. Your wall push-up practice serves as both exercise and health indicator.
The extensive benefits include:
- Bone density maintenance – strengthening muscles that support skeletal health
- Enhanced coordination – improving multi-muscle group synchronization
- Independence preservation – building functional strength for lifelong mobility
Wall push-ups particularly benefit those managing osteoarthritis by strengthening surrounding muscles that provide joint support and pain relief.
Standing Hip Abductions for Pelvic Stability
As you age, your hip abductor muscles—including the gluteus medius, gluteus minimus, and tensor fasciae latae—become vital defenders against falls and mobility loss.
Standing hip abductions directly target these important stabilizers by moving your leg away from your body’s midline.
You’ll strengthen the muscles that control lateral movement and balance, reducing your fall risk while improving pelvic stability.
Start with simple side leg lifts, engaging your core for maximum effectiveness. Progress gradually by increasing lift height or adding resistance.
These exercises enhance your spatial awareness, posture, and gait patterns while preventing hip migration and muscle shortening. When hip abductors weaken, other muscles may compensate incorrectly, leading to compensatory movement patterns that increase injury risk.
Regular practice reduces knee and hip pain, maintains bone density, and supports the independence you need for confident daily movement and directional changes.
Frequently Asked Questions
How Often Should Older Adults Do Strength Training Exercises Each Week?
You should perform strength training exercises 2-4 times per week for ideal results. Even twice weekly on nonconsecutive days can be effective, especially if you’re starting with poor initial fitness levels.
What Equipment Is Needed to Start a Muscle Strengthening Routine at Home?
You’ll need adjustable dumbbells for versatility, resistance bands for portability, and a folding weight bench for support. Add floor mats for safety and mirrors to monitor your form during exercises.
How Long Should Each Strength Training Session Last for Beginners?
You should start with 15-30 minute sessions as a beginner. Begin with shorter 15-20 minute workouts to build your routine, then gradually increase to 45-60 minutes as your strength improves.
Can People With Arthritis or Joint Pain Safely Do These Exercises?
Yes, you can safely do strength training exercises with arthritis. Start slowly, use light weights or resistance bands, avoid high-impact movements, and monitor your symptoms closely for any increased pain.
When Is the Best Time of Day to Perform Strength Training?
You’ll perform best in late afternoon or early evening when your muscles are naturally strongest. However, you should prioritize consistency over timing—choose whatever time you’ll stick with regularly.


Leave a Reply